
Using MailChimp Automation To Create Drip & Nurture Email Campaigns
Developing an email marketing strategy is an important part of today’s marketing strategy for every small business. Even more so, is taking advantage of automation – setting some of these marketing activities to happen automatically, or as they are triggered by an event. There are a variety of tools out there for email marketing – Constant Contact, MailChimp, AWeber, Campaign Monitor to name a few – but of those, I like MailChimp. Why? MailChimp has an easy to use platform, is free, until you add things like automation and thousands of emails in a list and it’s easy to create a responsive email. However, the biggest reason I like MailChimp is because of MailChimp automation.
MailChimp automation is a paid feature in their platform, however, it’s really very affordable. For $9.99/mo, you can take advantage of MailChimp automation – less than 10 bucks! But what would you use it for, you ask? To interact with your website visitors using a drip or nurture campaign.
What is a “drip” email campaign?
A drip email campaign is based on time – it’s usually a series of emails sent out over a certain span of time to help move a lead to the different stages of awareness where knowing your target audience is key. The idea of the campaign is to help establish your business (and yourself) as an expert – as an authority about the topic they “opted-in” to. Quick aside: Make sure that your email list has people who have truly opted-in to your emails and not harvested or purchased. That’s not how this works.
A good drip campaign might go out over two weeks, maybe less, and will contain information that is relevant to the recipient based on their reason for opting into your email list. Each email builds upon the last to again, position you and your business as the right solution for the recipient, without making the hard sell to obvious.
Still on the fence about email marketing and drip campaigns? Research done by an email marketing company, Emma, has shown that relevant emails (IE drip campaigns) drive 18 times more revenue than broadcast emails. People want relevant content. Drip campaigns are one way to deliver that to them.
Usually a drip campaign is informational – it’s not overly salesy and contains “free” information that the recipient can use – giving them the value they are looking for, however, not too much. Your overall goal is to have them contact you and become a paying customer, not to just absorb your free content.
MailChimp Automation Drip Campaign Strategy
The whole idea about content marketing is repurposing content. That’s just what you should do for a drip campaign. One of the easiest way to do this is to publish a blog post and include a lead generation form within it. The blog post is a great way to create interest, however, blogs don’t generally require you to submit an email to read. This is where a lead magnet comes in. By offering another valuable piece of content – a book, a course, or some other type of valuable content, you can then offer it in exchange for their email address. Once you have their email, by using some form of automated system, MailChimp automation, for example, you can deliver that content that they expect. Now, if your content is in the form of a course, or if you want, you can continue to send “drip” emails over time, each leading the recipient closer and closer to a potential conversion.
Here’s how using MailChimp automation, you can setup a multi-email drip campaign:
- Create your blog post in WordPress (or wherever you have a blog). If you use WordPress, there’s a great plugin for WordPress that makes adding forms from MailChimp really easy, called MailChimp for WP, but it’s not necessary. Once you’ve got your blog written, you’ll need to add your lead generation form.
- Create your list in MailChimp. Then click on the arrow on the right and select Signup Forms.
- Create your signup form. There are multiple ways to do this – see the image below. I prefer to use the embedded forms rather than the plugin because the plugin, unless you pay for the Premium, you can only create one form. Since I have multiple lead generation forms, I would want multiple forms that all do the same thing differently. How I get around that is using an embedded form.What you will want to do is to create a custom field in your form called “ContentUpgrade” and give it an initial value that can easily be related to the purpose of the form and make it a hidden field. For instance, if the form is on a content marketing blog post, you’ll want to enter “contentmarketing” for the initial value for ContentUgrade.The reason for this to identify the recipient as having signed up for “contentmarketing” related content. The hidden field is not visible to the user, but will remain with the user’s information in your list.
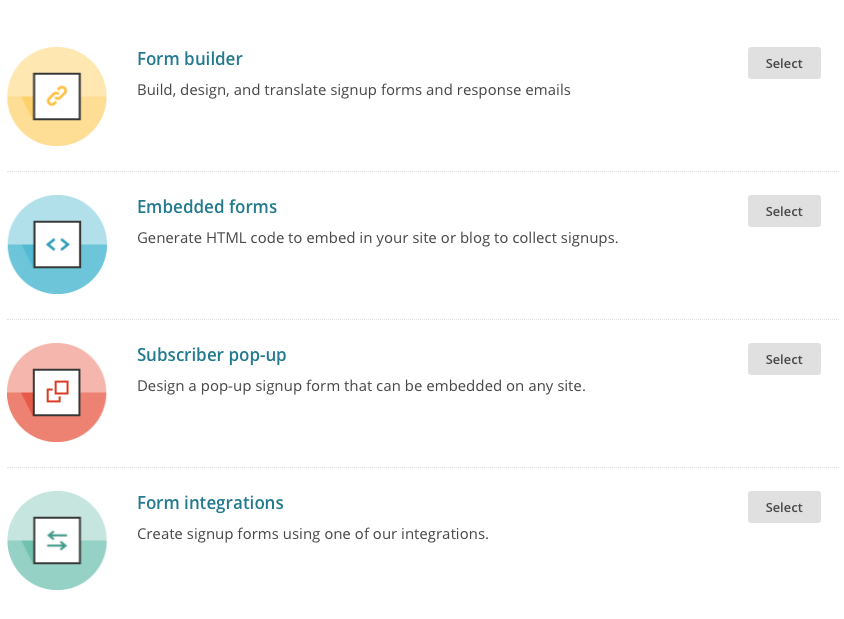 There are other methods of doing signup forms, including using a pop-up, creating a signup form page (not on your site, really) or using an integration like Wufoo or Squarespace. Let’s continue with the embedded form (my personal favorite).Once you have the form they way you want it, you’ll need to embed it in your site. Depending on how your site is built, it may need to be a raw HTML box in WordPress or embedded into your HTML page. This may require some added styling and moving around of code, but it’s not terrible.
 - Make sure double opt-in is off in your form and make sure the form is set to update existing subscribers.
Your blog post and form are now setup to attract and collect leads using a drip campaign. Now, we need to create the drip campaign.
- In MailChimp, click Campaigns, then Create Campaign.
- Click Create an Email, then Automated, and Custom.
- Name your campaign something related to the list, the signup form or the blog post, so that you remember later what you did.
- Select the list you want to add your leads to for receiving the drip campaign. Click Begin.
- Where it says “Trigger” click Edit Trigger. Change the delay to Immediately because this will be the first email in the campaign and you want it to go right out when the person “subscribes”.
- Click Change Trigger, click List management, then Changed list field to value and select ContentUpgrade and type in the value exactly as it appears in your MailChimp form, in this case “contentmarketing”. Click Update Trigger.
Your drip campaign is all setup in MailChimp. You can style the email, add content (it doesn’t have to be just one thing!) and send it out. For additional emails in the campaign, repeat the process for creating an email and assigning a list. Keep in mind, you’ll want to do all this before publishing the blog post with the form. You might even want to plan out your entire campaign so that you can just set it and forget it.
One last thing: TEST. Test your form. Test to see that the emails go out. Test and test some more because this whole thing is no good if you’re not able to collect leads and serve them the content that they signed up for!
What is a “nurture” email campaign?
A nurture email campaign is based on behavior – for example, if you went to a landing page and opted-in to an email list. Then after the first nurture email is another email, based on the behavior from the last email, catering each email to the behavior of the recipient, thus sending them information that they want and are interested in. Nurture campaigns work similarly to drip campaigns, but instead of assuming that they want to see everything you have about content marketing, you’ll know exactly because of what they click, things they’ve downloaded, etc.
Nurture emails using MailChimp automation work similarly to drip campaigns. However, it’s important that you have your nurture campaign setup fully before it launches so that no email in the series is missed because it wasn’t previously setup.
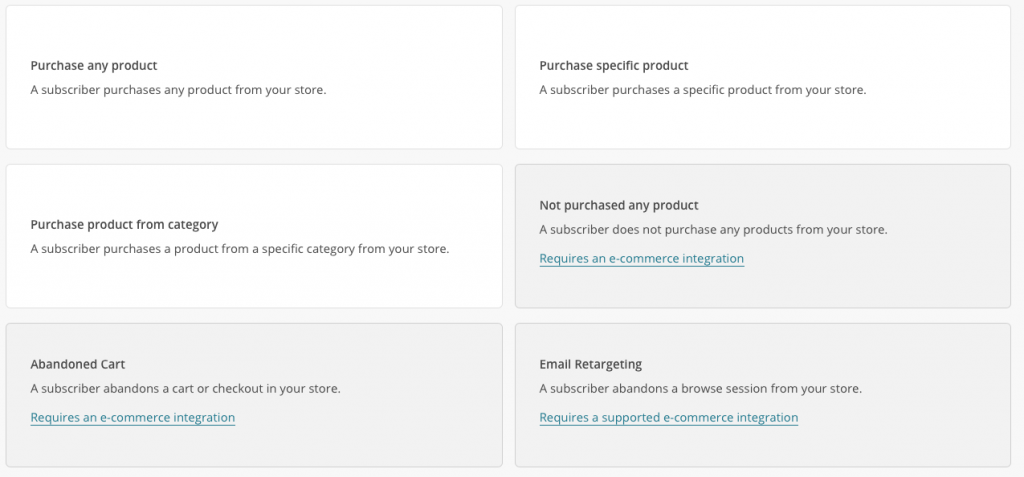
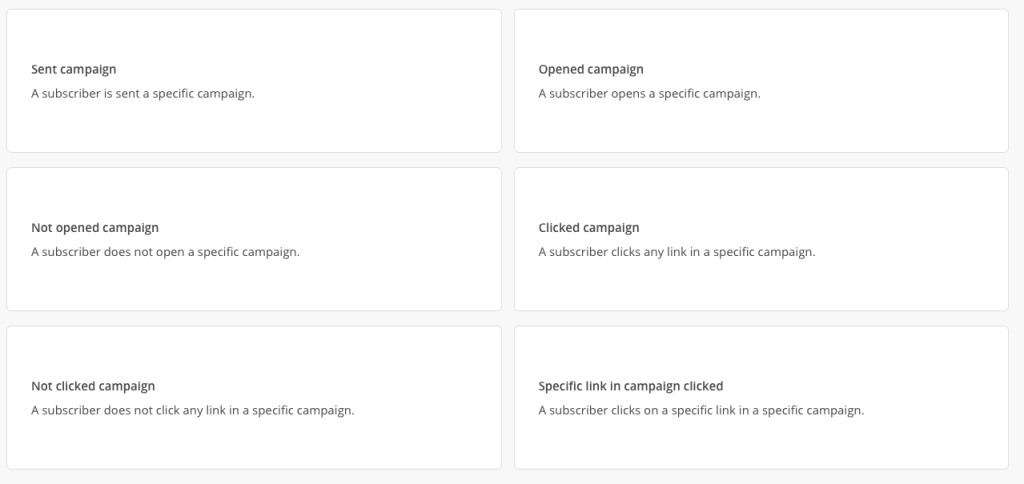
You would setup nurture emails via the same process as drip campaigns, however, instead of clicking List management when changing the trigger, you would select E-commerce or Campaign activity based on the desired application.
Options for E-commerce triggers include:
Options for Campaign activity triggers include:
You’d set these up to send immediately, upon the trigger being set, unless you wanted to send a series of related emails in a drip style based on the recipient’s behavior. So, as you can see, drip and nurture emails can be used together – most effectively!
All-in-all, the MailChimp automation feature above is a $9.99 well spent IF you use its capabilities wisely. Email marketing can be very effective when used to help “nurture” a lead to convert. However, I caution you to not rely on email marketing alone to do your lead nurturing. There’s no replacement from person-to-person contact, via phone, personal email, social media, chat – however, you do it, make sure you create a relationship with your potential customer so that it’s less about the sale and more about the relationship. By providing them with value, you’ll gain much more than a sale, a customer and meeting a bottom-line.


